When there are a lot of files that need to be separated from the structure of the original folder, but to retain the original classification information, adding the name of the parent folder at the beginning of the file name can quickly solve the problem of prefix confusion after moving the files. In the case of sharing scenarios, batch archiving or automated processing, the receiver can quickly identify the file ownership. If the file is copied to different locations, adding the source folder name can also avoid version conflicts and clarify the source of the file. The following describes how to add the name of the parent folder to the front and end of the file names of thousands of files in batches. It supports Word, Excel, JPG, PPT, PDF and other file formats.
1. Use Scenarios
when hundreds of files need to be centrally shared and transferred or backed up and archived, you can add the parent folder name of the path in batches at the beginning or end of the file name. After the files are moved to the same directory, the parent folder name with the file name can retain the original information, avoid file mixing, and facilitate subsequent retrieval.
2. Effect preview
before treatment:

after treatment:

3. Operation steps
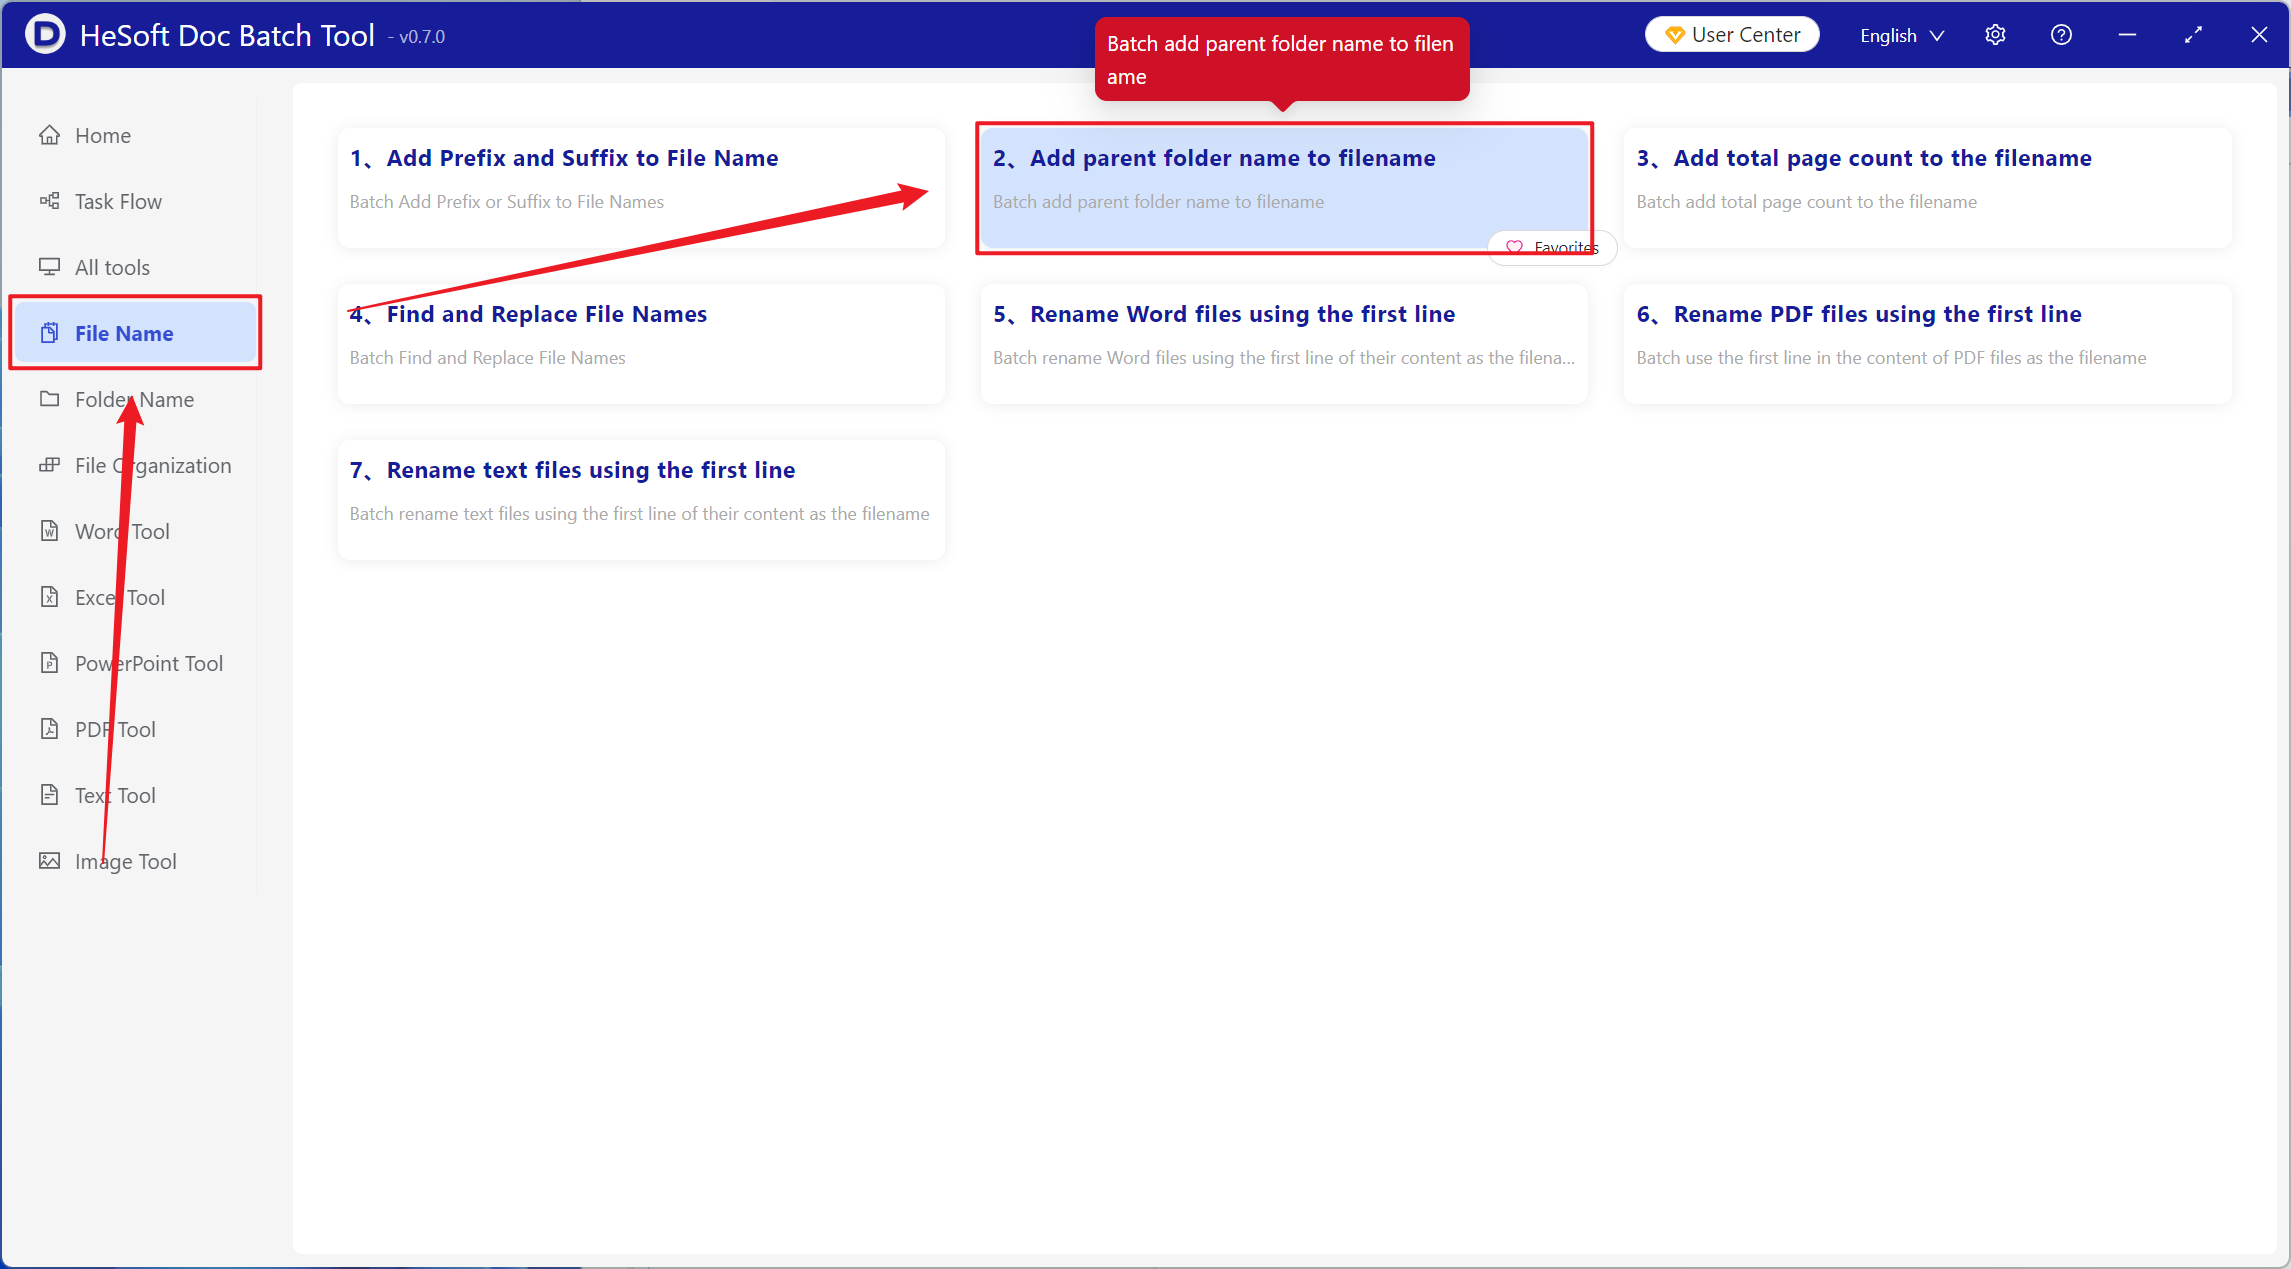
open 【HeSoft Doc Batch Tool], select [File Name]-[File Name Add Name of Parent Folder]].
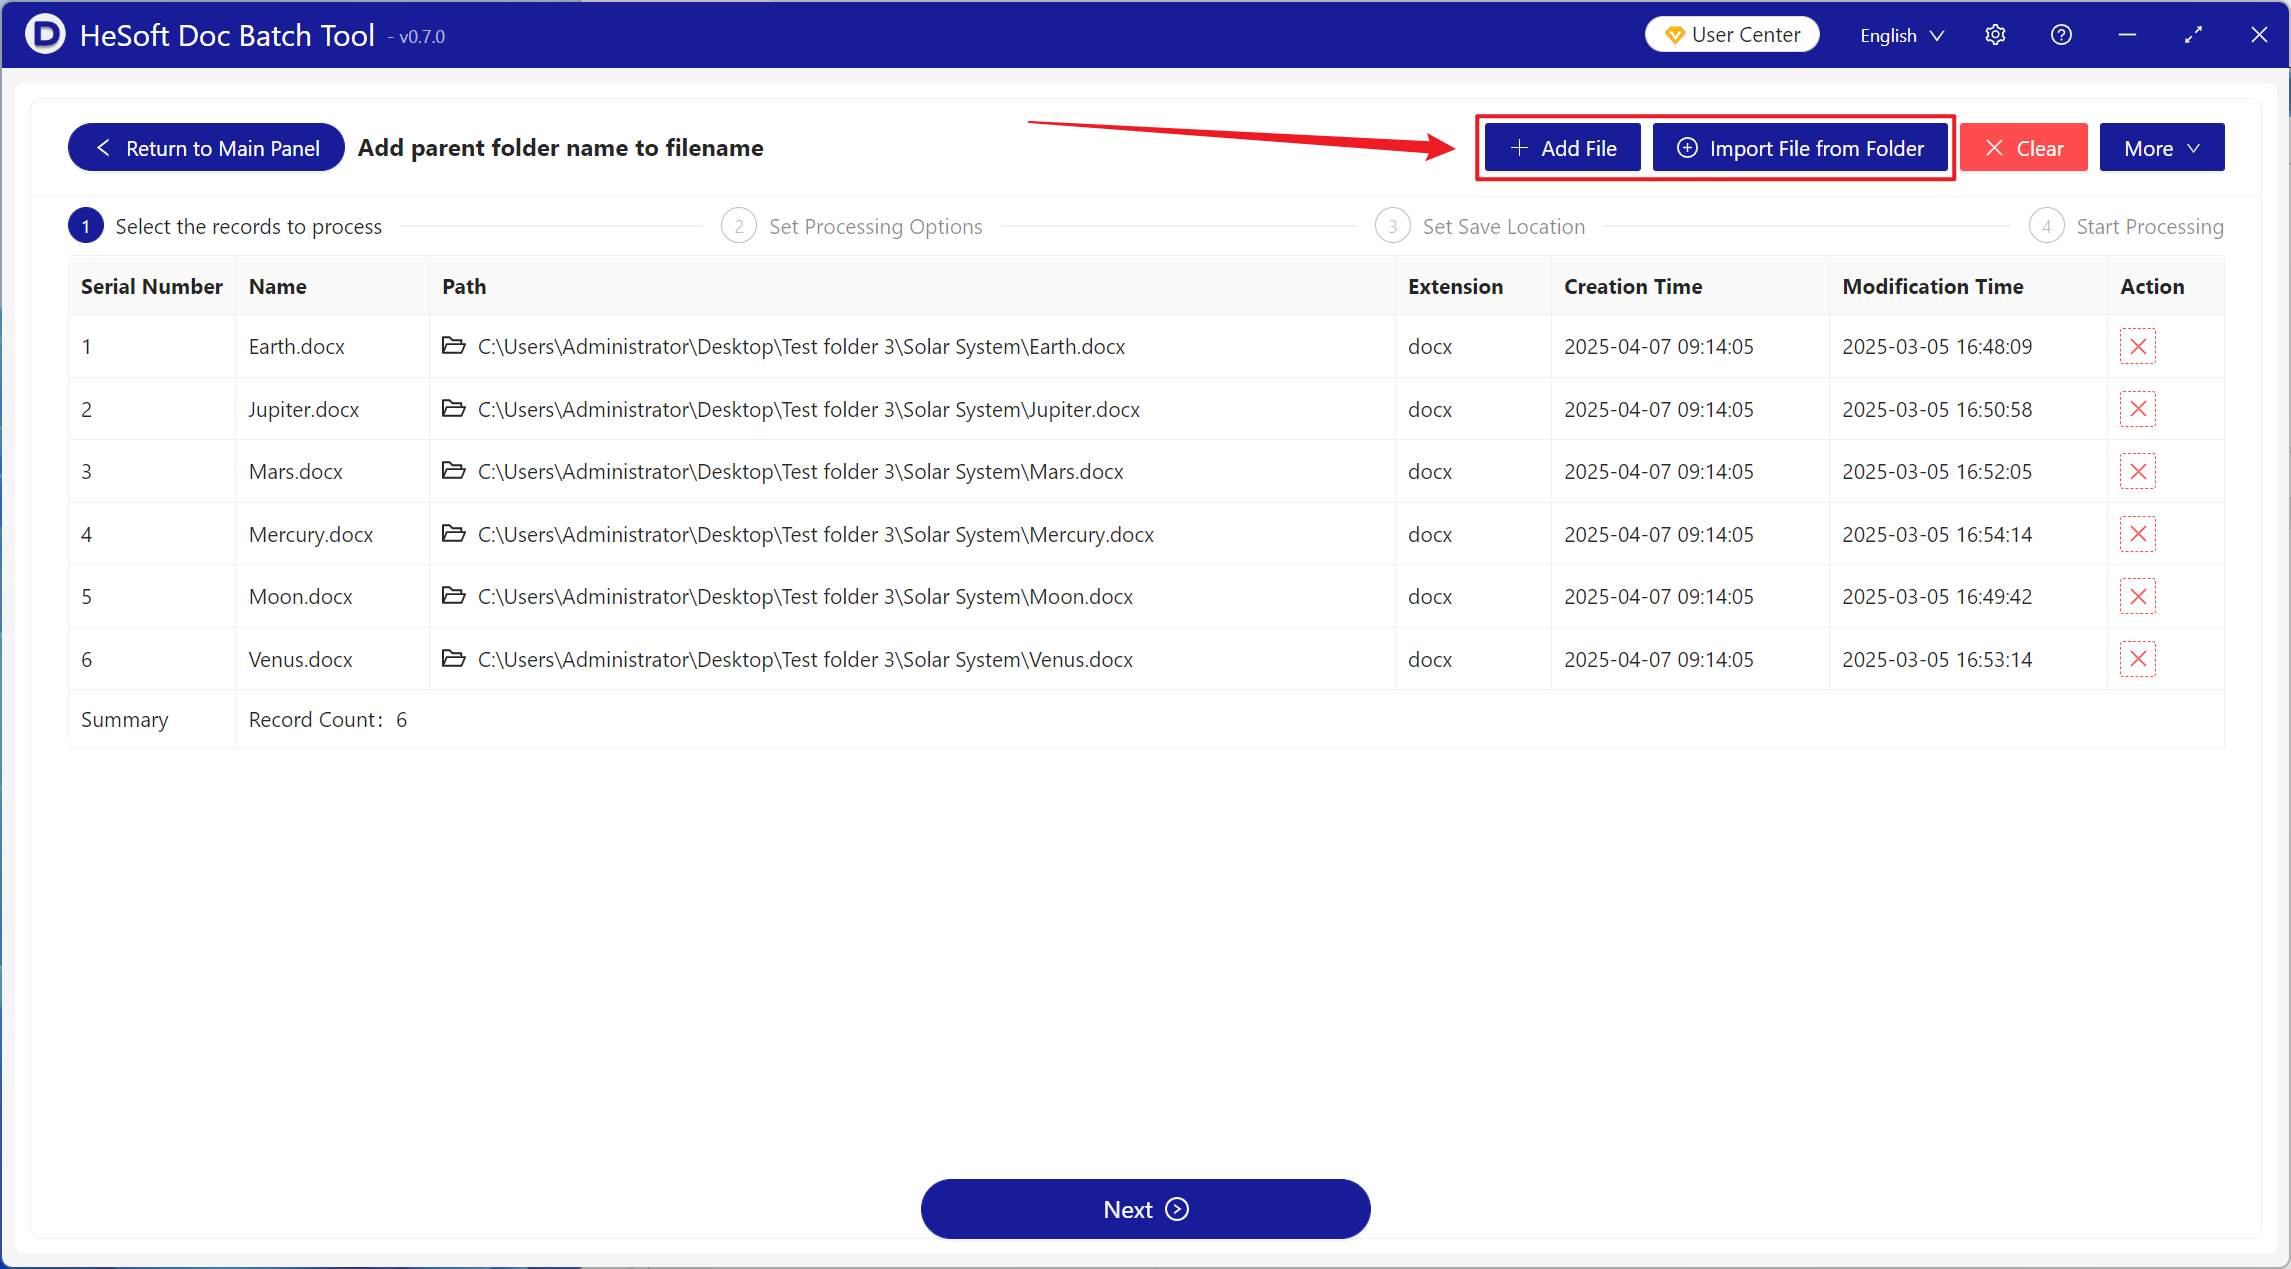
[Add File] Add single or multiple files that need to be added to the upper folder name at the beginning or end of the file name.
[Import File from Folder] Import a folder that contains a large number of files that need to add the upper folder name at the beginning or end of the file name.
The imported files can be viewed below.
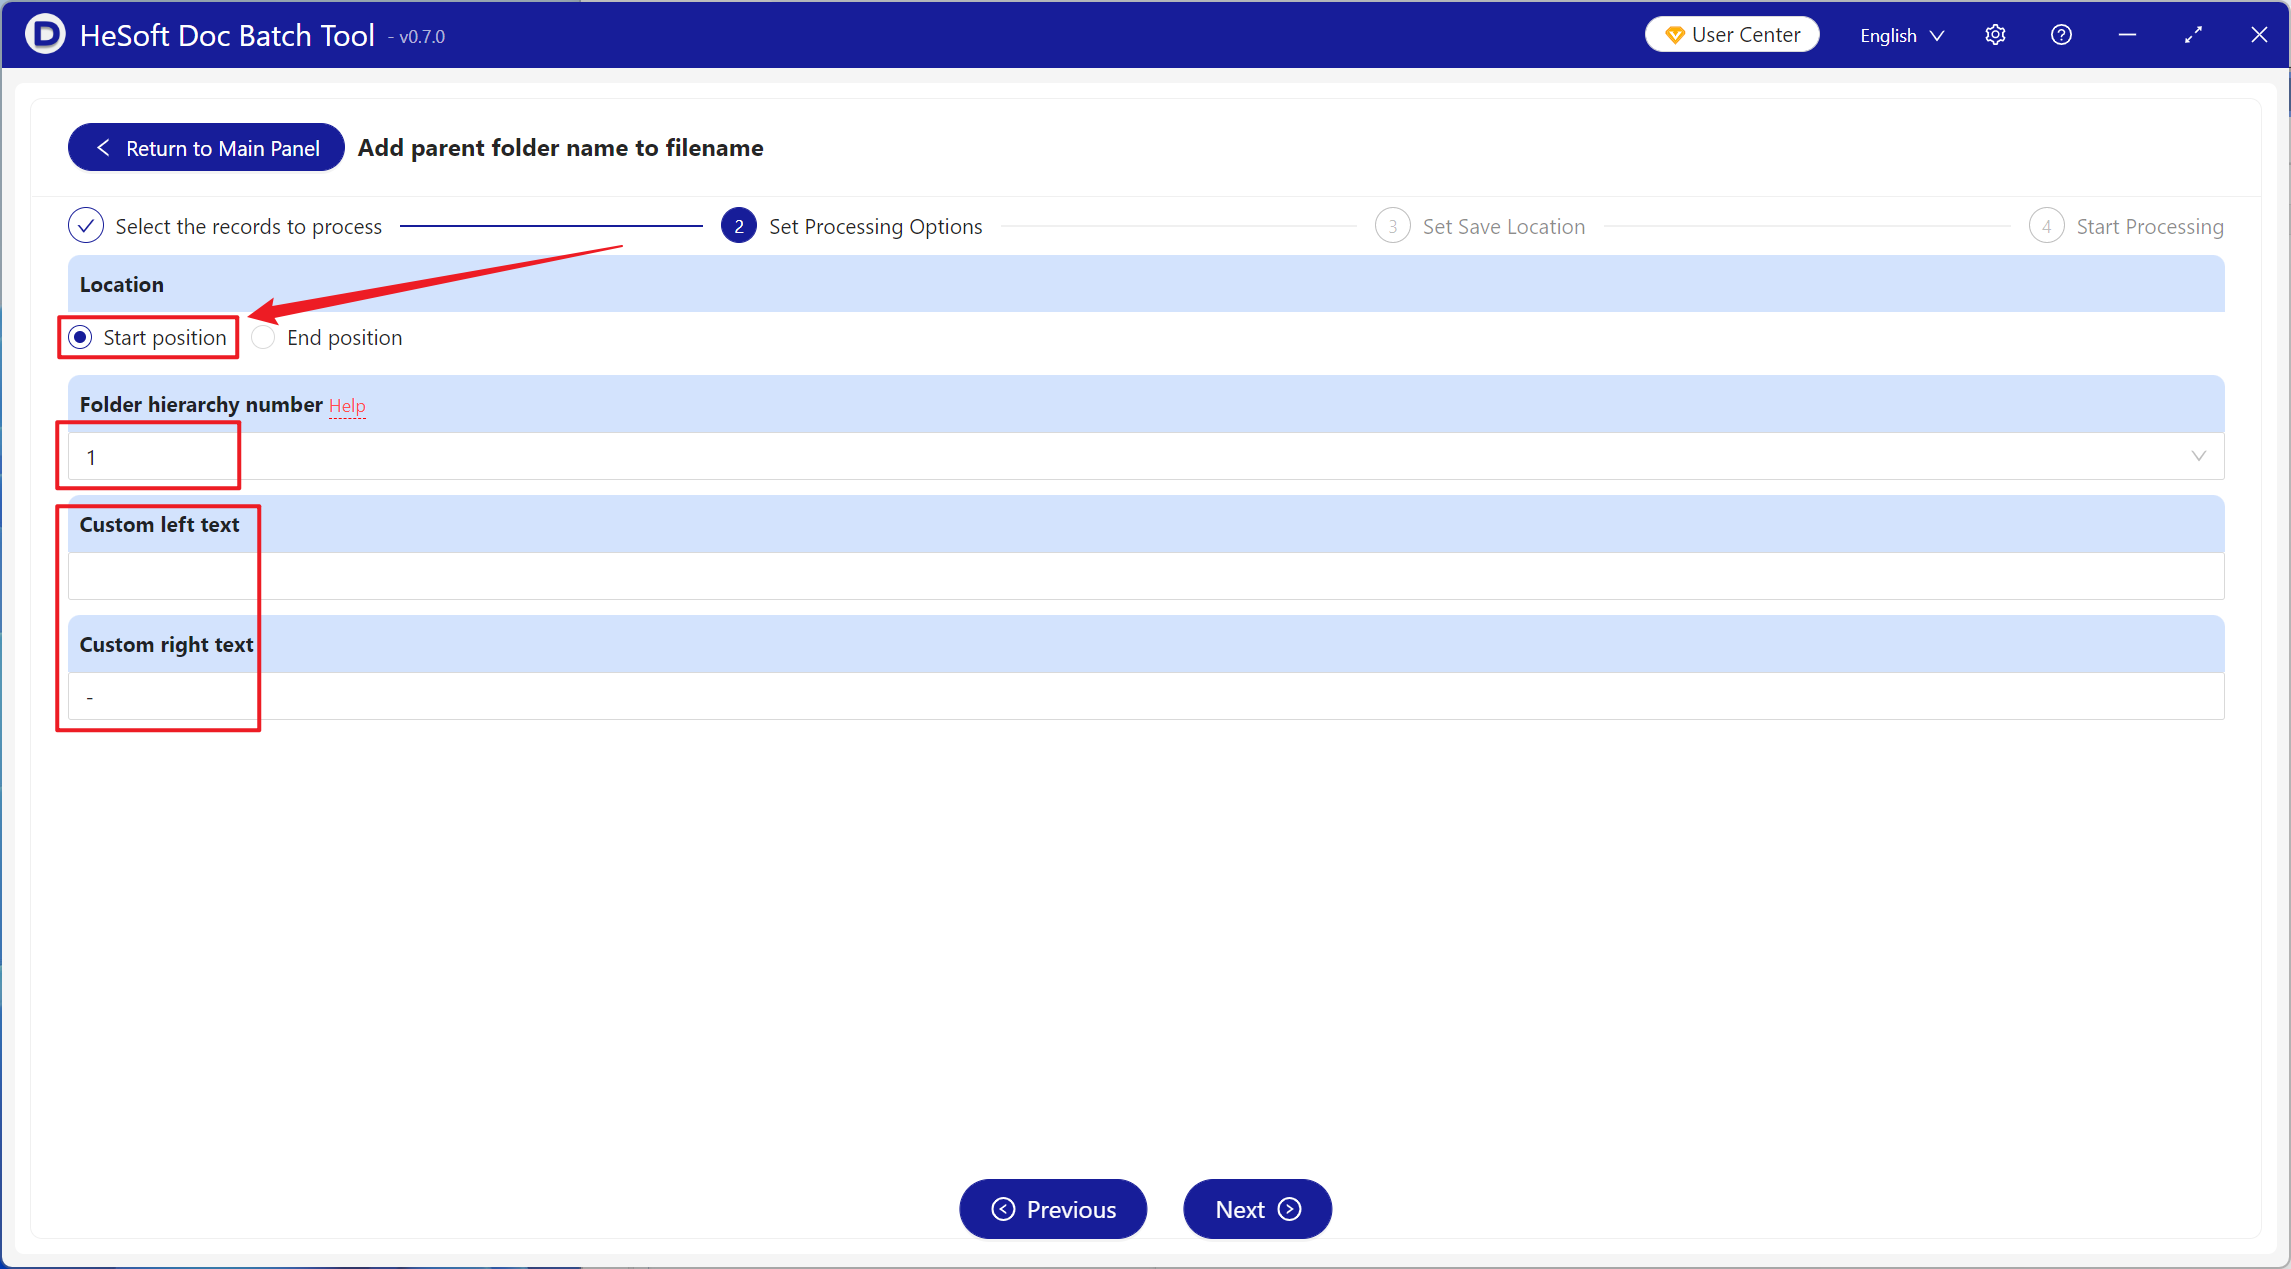
[Location] Start Location: Add the name of the superior folder in front of the file name. End Location: Add the parent folder name after the file name.
[Folder Level Serial Number] The level serial number is the serial number of the location where the folder in the path is located. For example, there is a file path: [d:\a \B \c.txt], 1 means B, 2 means a, and so on.
[Text on the Left of Customization] Add custom content to the left of the added upper-level folder name.
[Text on the Right of Customization] Add custom content to the right of the added parent folder name.
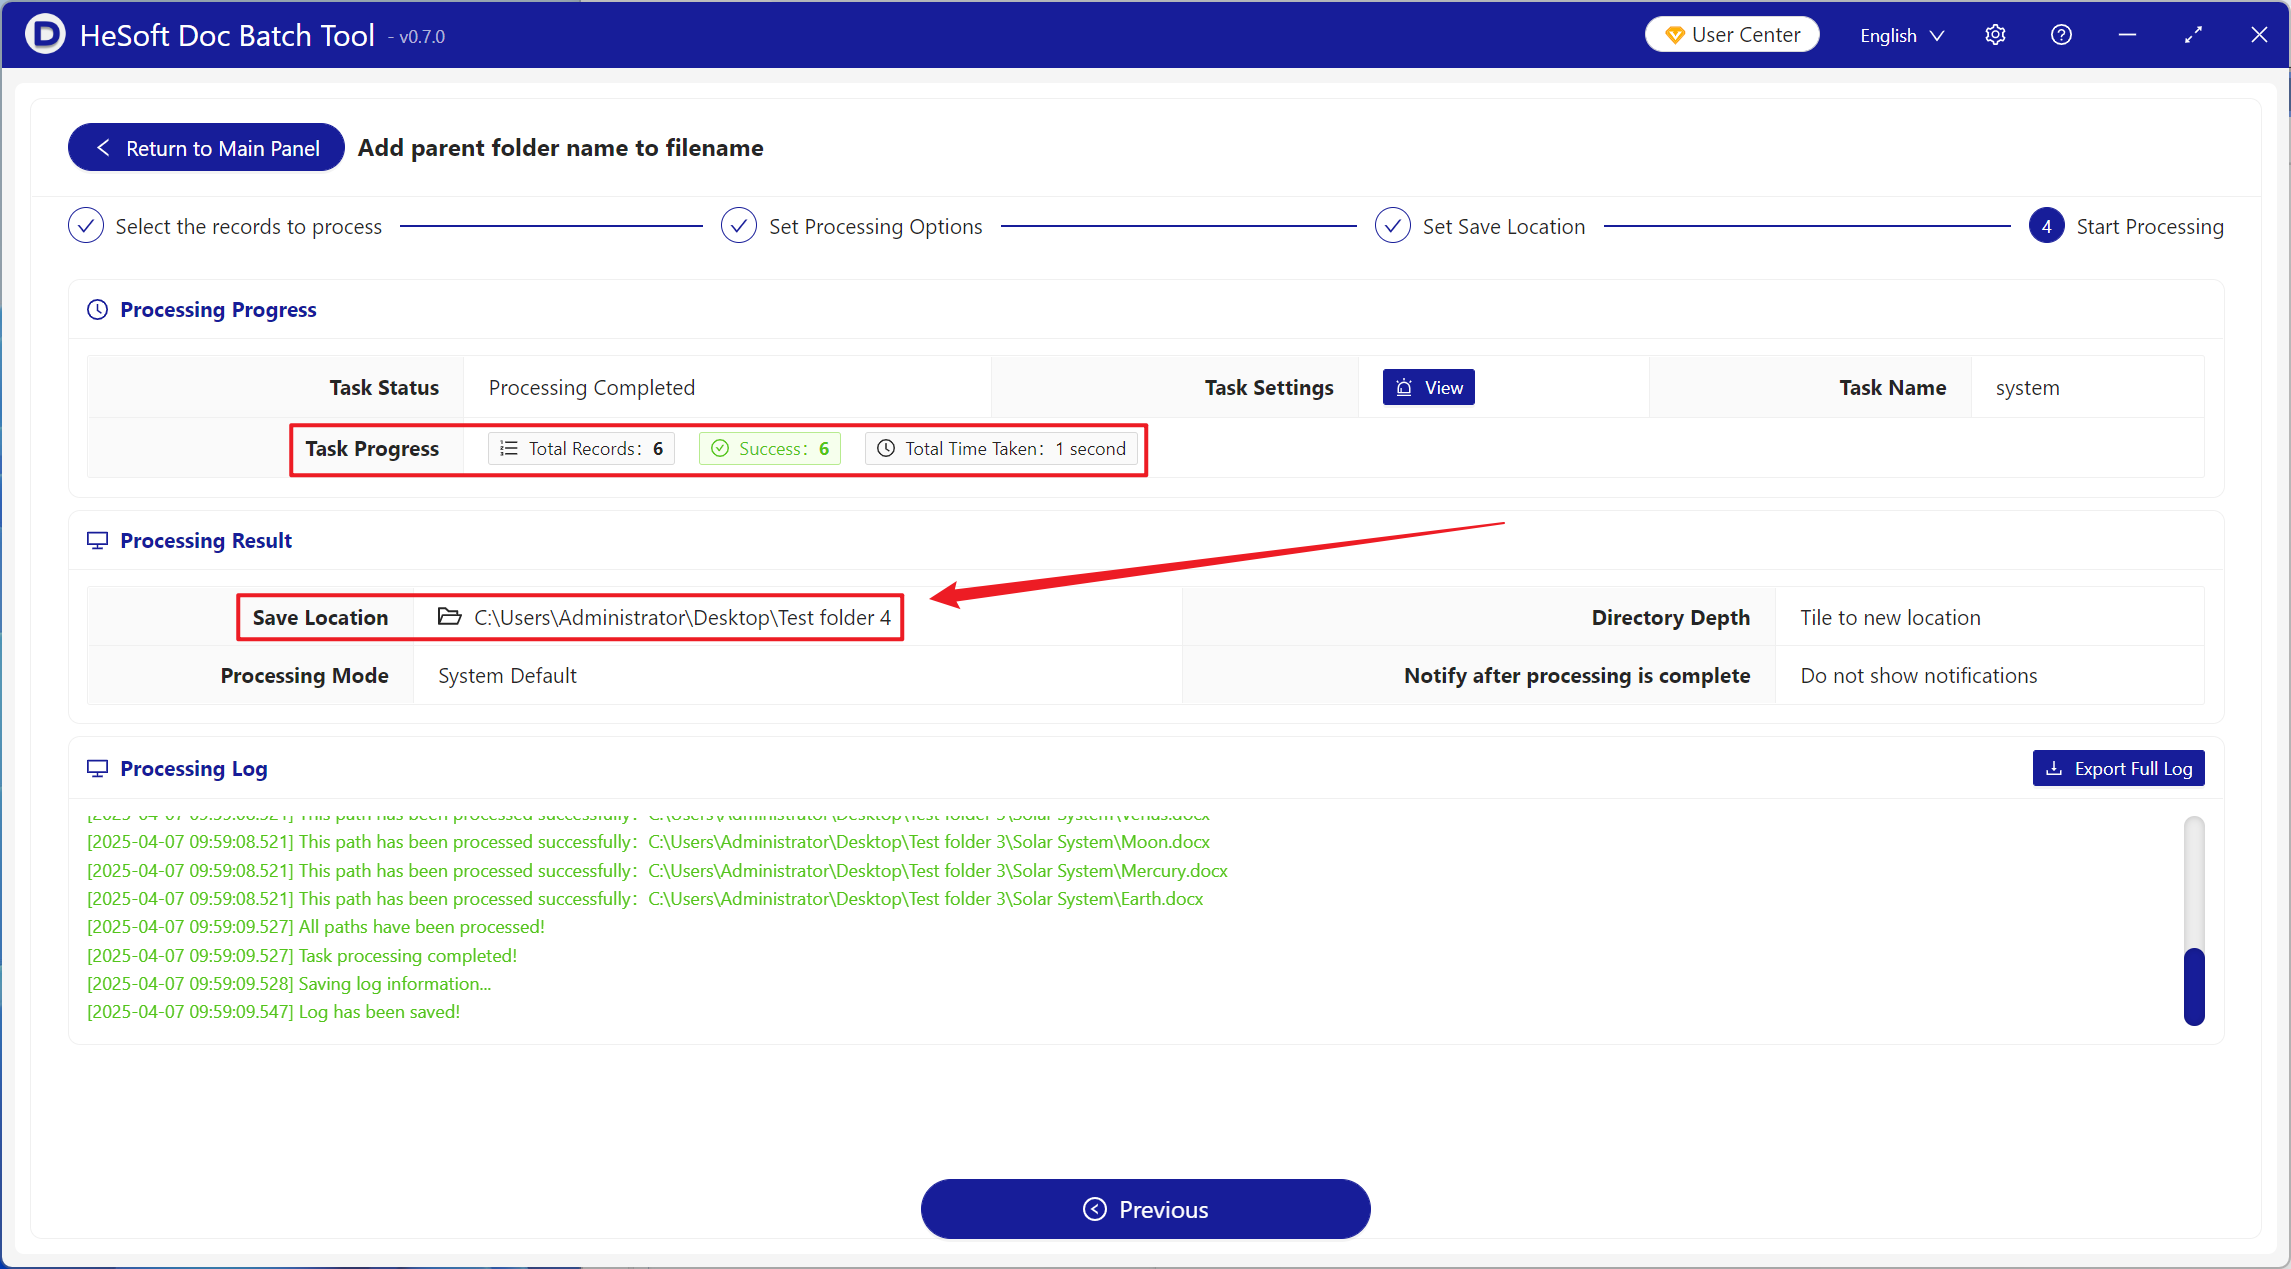
After waiting for the processing to complete, click the path behind the save location to view the name of the added file.