After receiving or making Excel forms in the work, it is often necessary to save them as pictures for use, but the pictures obtained by directly using the screenshot tool are often not clear enough. At this time, we can adjust the PPI parameter and save them to obtain very high-definition pictures. For example, if PPI of the printed report is adjusted 300 PPI, the printed data and charts will be exported more clearly than normal. When different devices transmit preview, the input 200 PPI will not only not be too large in file volume, but also can be seen clearly on mobile phones and computers. In short, PPI is a very important indicator to measure whether the picture is clear or not. The higher the PPI value is, the resolution of the picture will be as high as the PPI, and the picture will be clearer. So how should we set up PPI to ensure the quality of images before many Xls and Xlsx format files are exported to JPG images in batches? Here is a practical tip to quickly export forms to high-definition JPG, which greatly improves our work efficiency!
1. Use Scenarios
when an enterprise wants to change a lot of financial statements or employee data in Excel format into JPG pictures for long-term storage, then we can use this function to increase PPI and save Excel worksheet as high-definition JPG pictures, so as to ensure that it will not be troubled by picture compatibility and unclear problems when it needs to be opened again in the future.
2. Effect preview
before treatment:

after treatment:

3. Operation steps
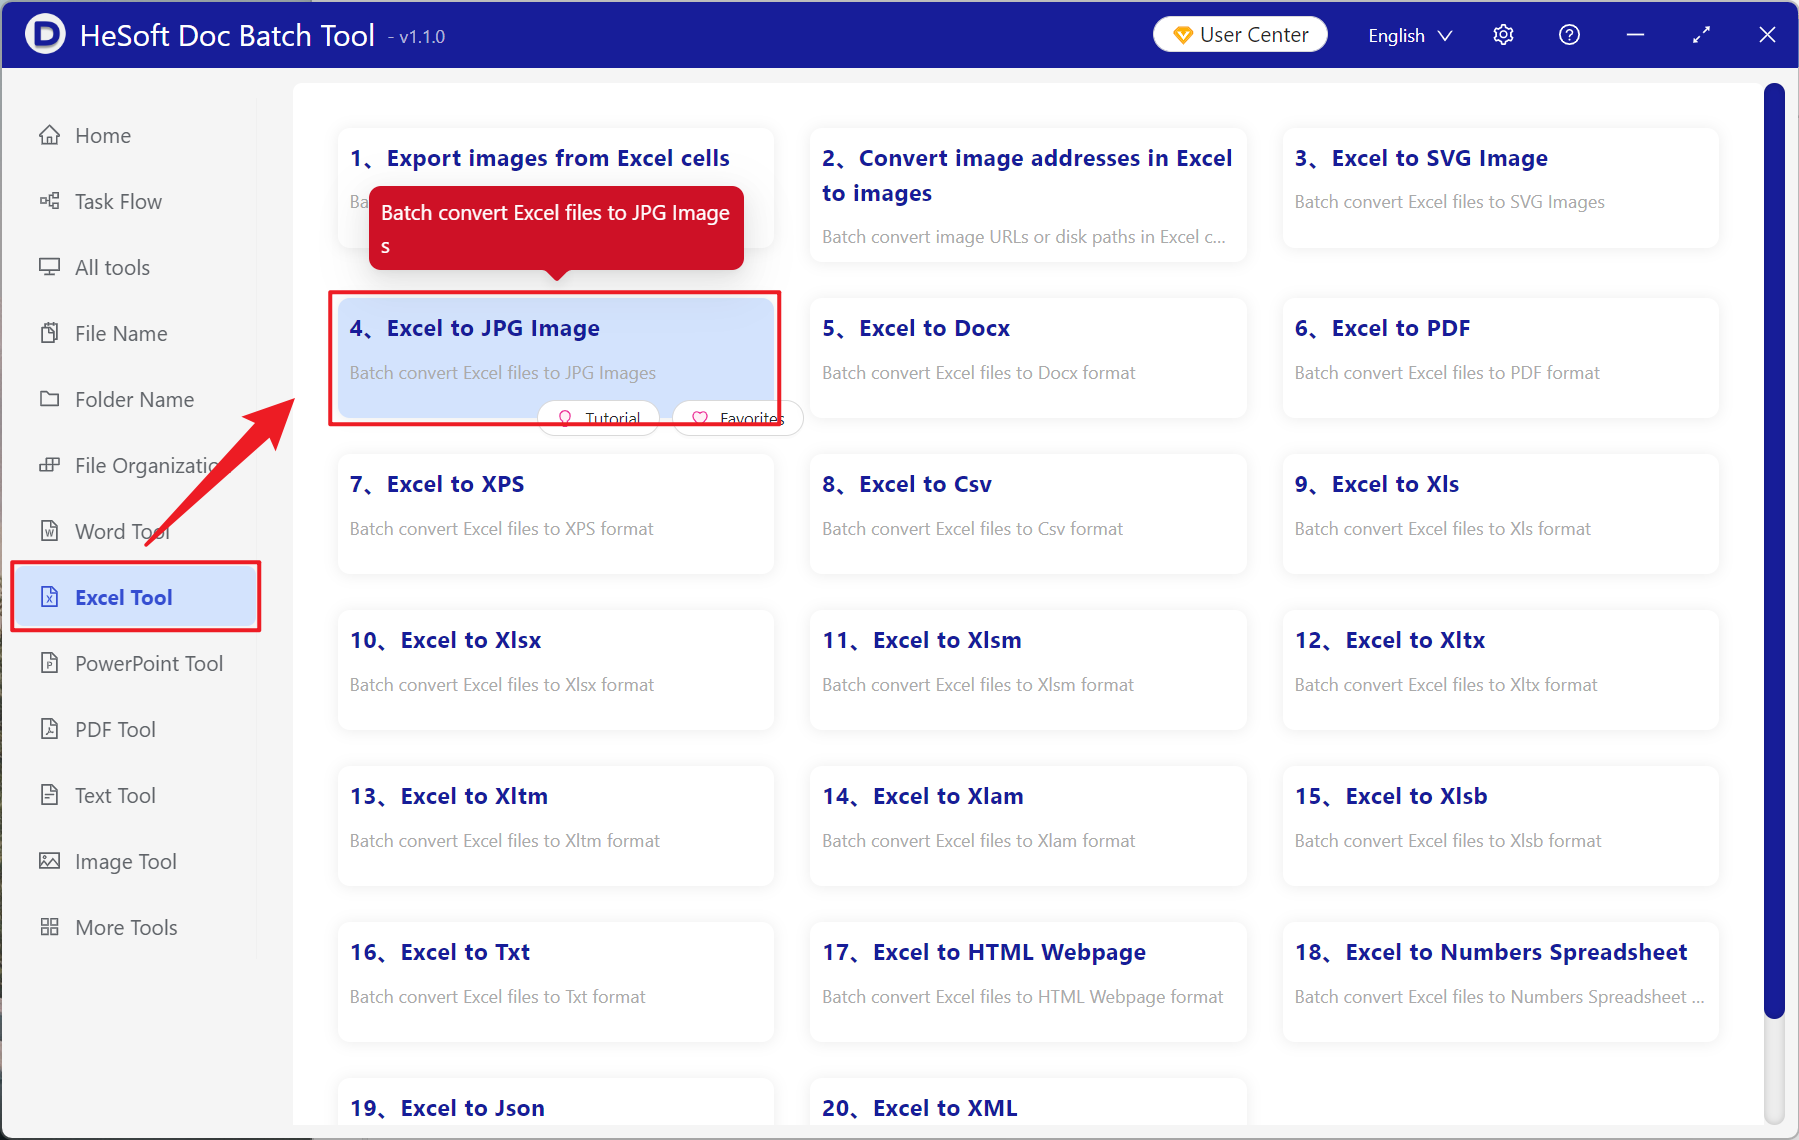
open 【HeSoft Doc Batch Tool], select [Excel Tools]-[Excel to JPG Picture]].
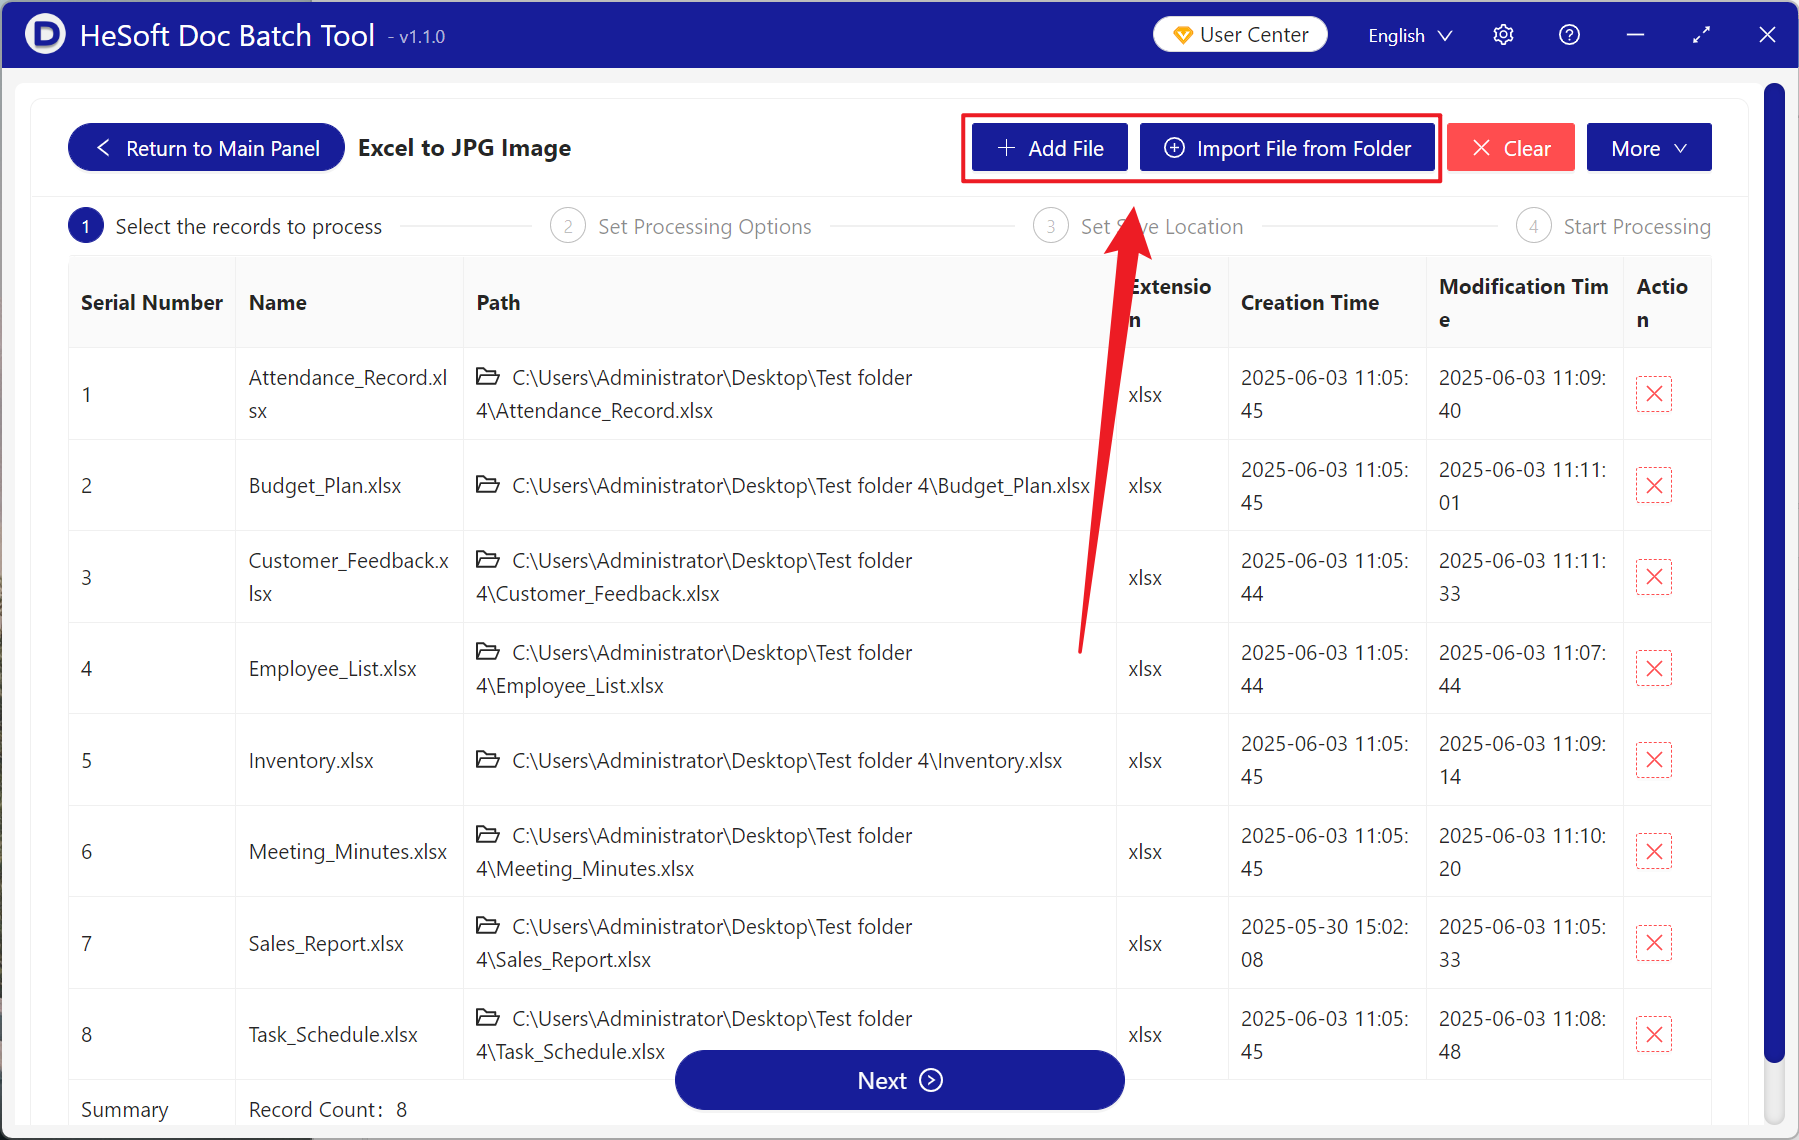
[Add File] Choose to add Excel forms that need to be converted into high-definition pictures.
[Import File from Folder] Import all Excel tables in the selected folder.
You can view the imported files below.
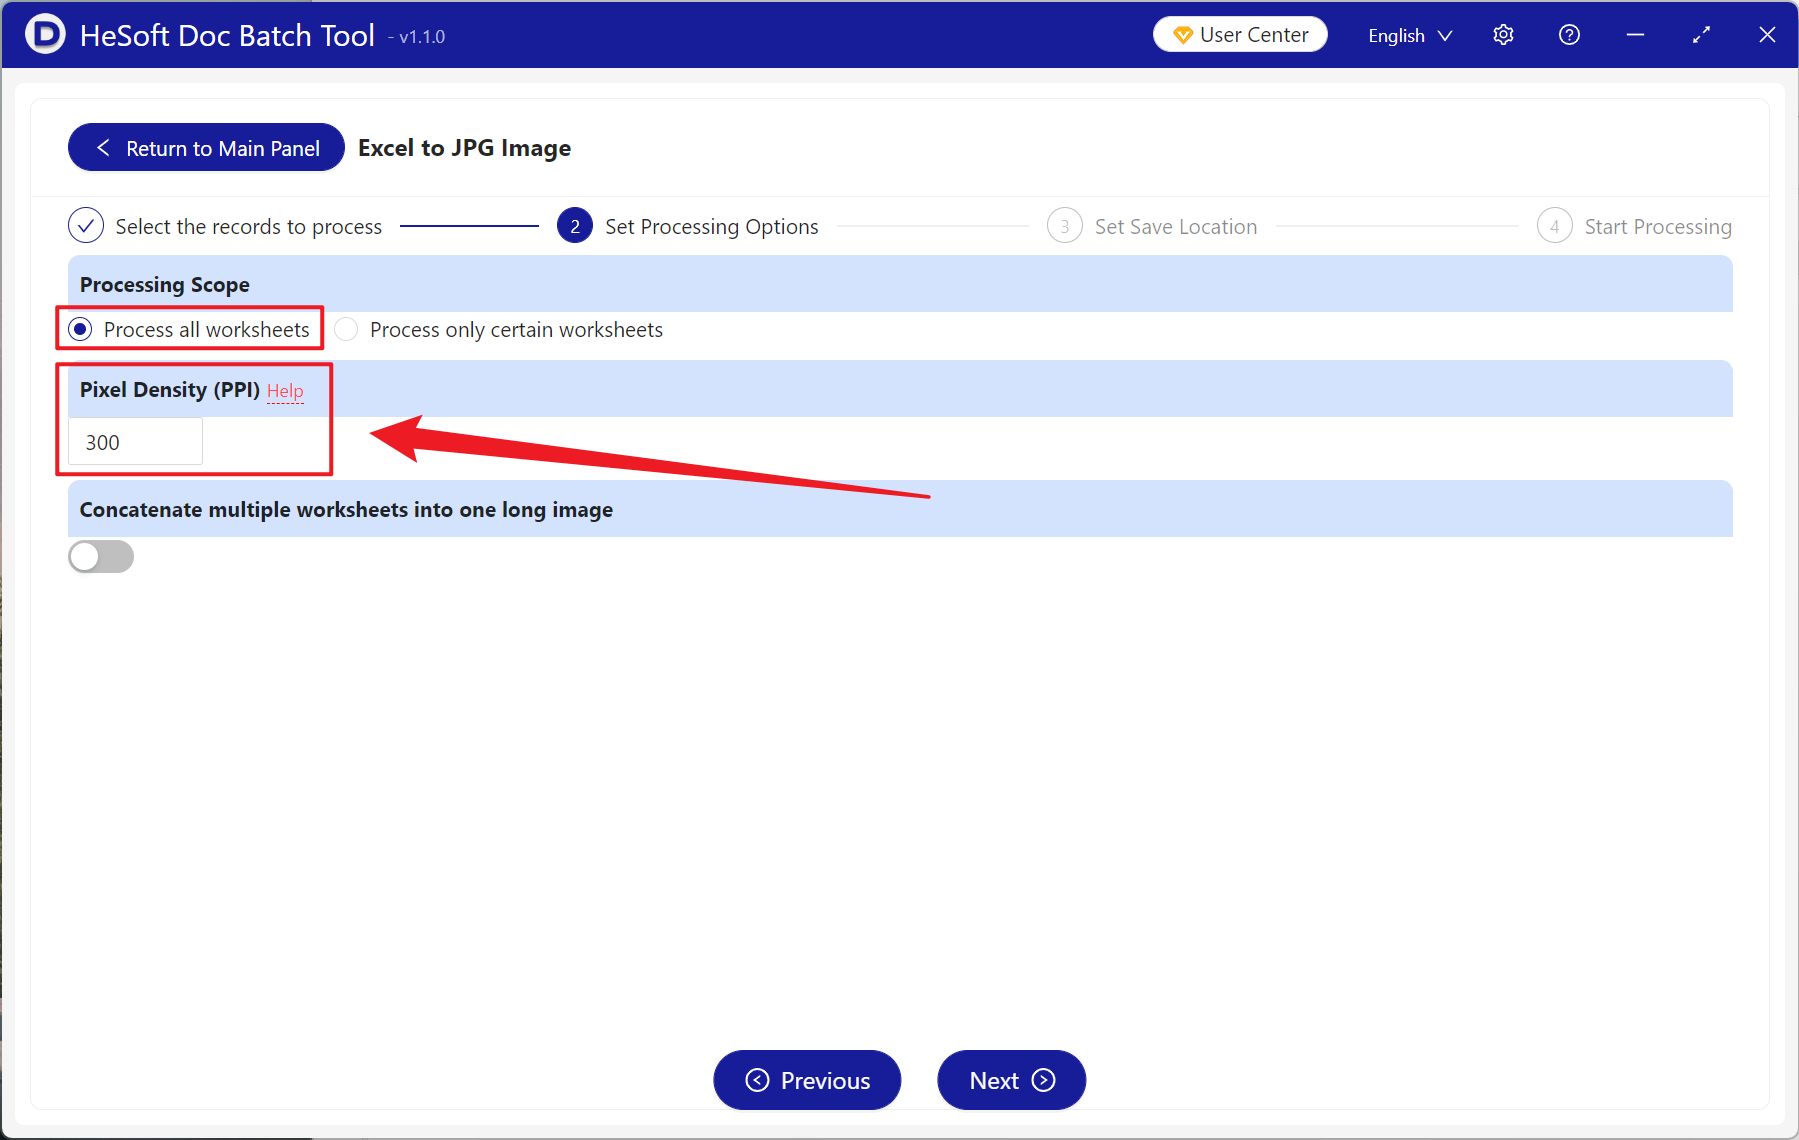
[Processing Range] Select to process all worksheets.
[pixel density (PPI)] here to choose the input, you can click to help view the description, the lower the value of the picture more fuzzy, the higher the value of the picture more clear.
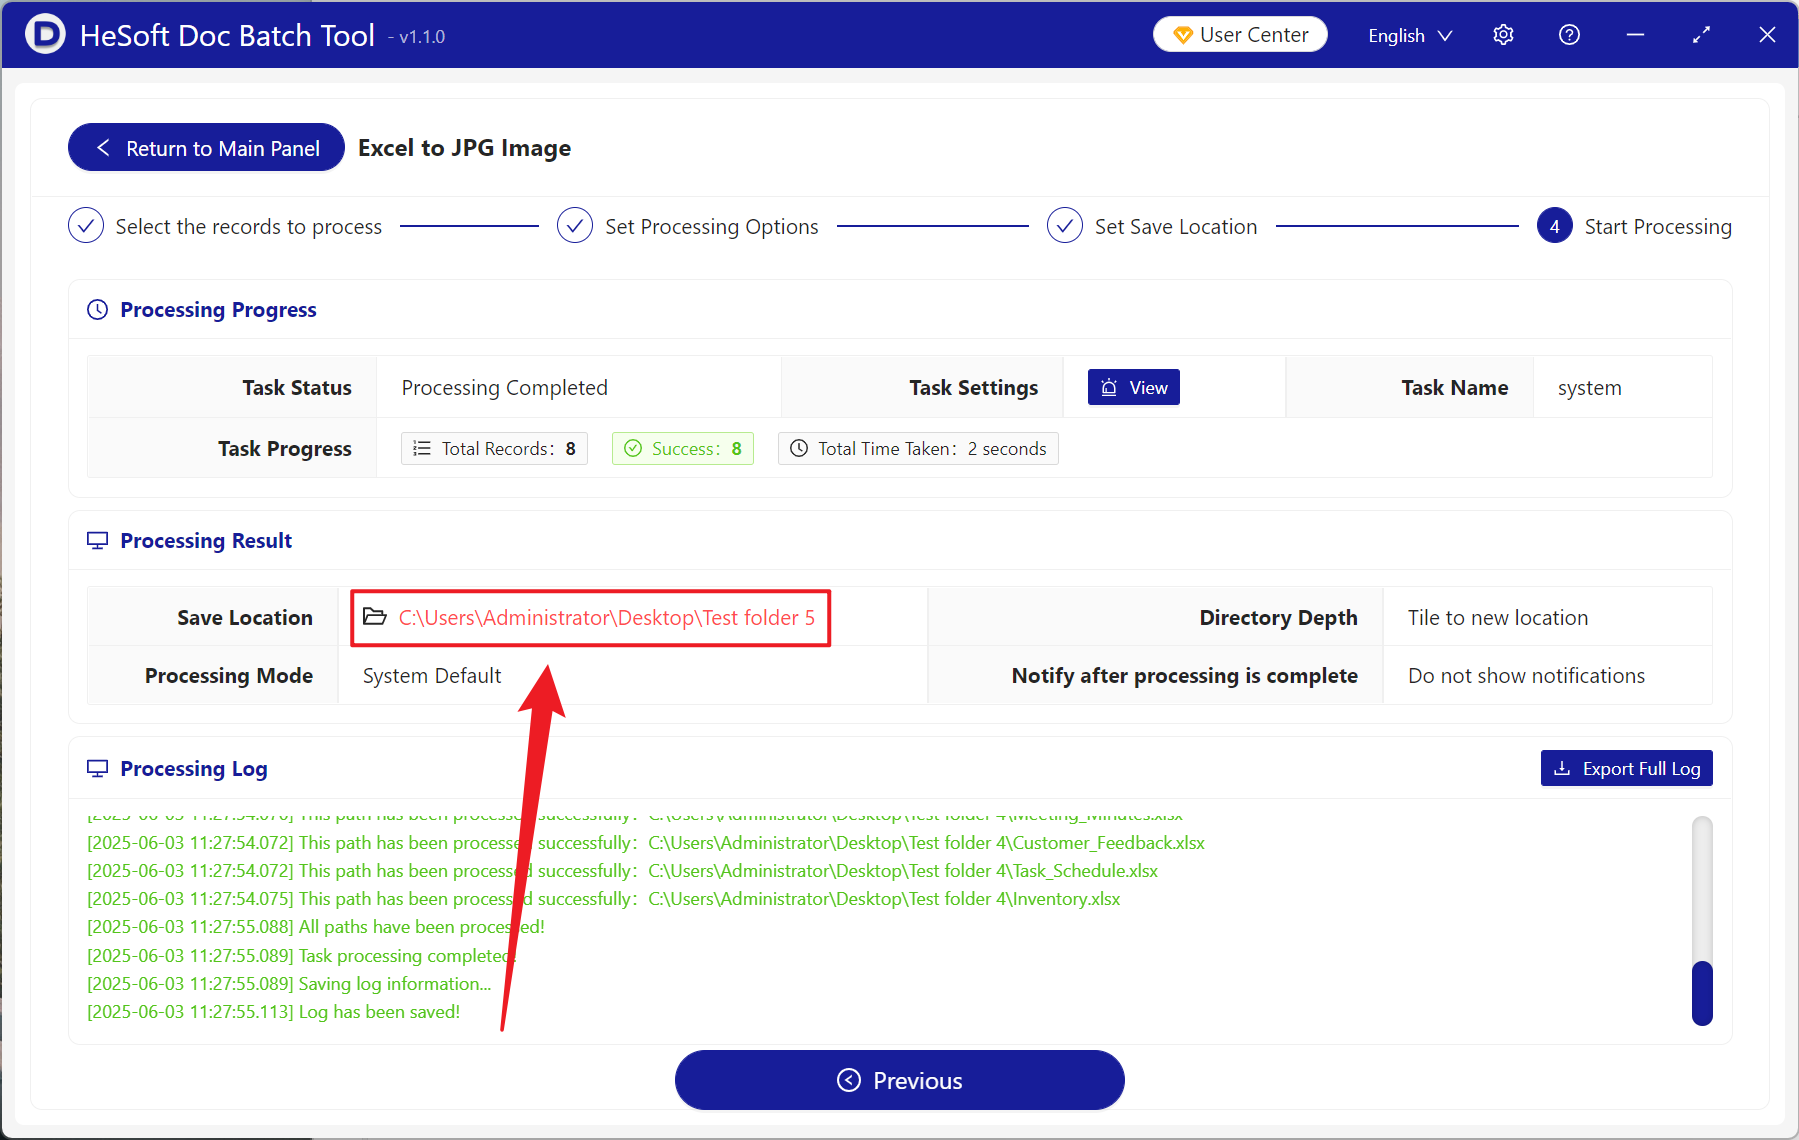
After the processing is completed, click the save location to view the successfully converted image file.